Showing posts with label baking. Show all posts

Tuesday, April 29, 2014

Coffee Hour: Department Domination Edition

If you've read my blog at all, you know that I go all out for my department's coffee hour when it is my group's turn to host. There is sort of an unofficial ranking of the best coffee hours in the department. The Barnett Group/Bedzyk/Chung coffee hour is usually somewhere near the top. However, it is generally accepted that Mason/Faber is one of the best. 

However, the Mason/Faber contingent is disbanding.

Professors are moving and retiring, and the Mason/Faber coffee hour will be no more. That leaves room for a new reigning coffee hour champion.

Enter: Barnett

The normal recipe: hummingbird cupcakes pre-cream cheese frosting

My labmate Ann and I decided that we were going to pour all of our confectionery efforts into totally bringing it this past coffee hour. I had a normal recipe in mind (these delicious and somewhat healthy hummingbird cupcakes). However, I also wanted to find the most insane recipe I could find to put our coffee hour over-the-top.

I present to you: Man-Whore Bars.


These bars are so intense that they put their predecessor of Slutty Brownies to shame. They look fairly innocuous when you look at them from the top view. But then you look at them from the side...

Holy moly.

I had to take a picture of the cross-section of these beauties because it is just so insane. And then you cut into them....

Edible geology!

I was actually laughing hysterically as I cut these bars because I had to put my entire weight on top of the knife to get it to cut through.


We said we were going to bring it this coffee hour, and ooohhhh, boy did we bring it.

Man-Whore Bars

From Baker's Royale


Ingredients


1 16oz. package of ready made cookie dough, or one batch of homemade (I made the cookie recipe on the back of the Nestle morsels bag, which is the best, duh)
1 batch of chocolate ganache (recipe below)
16 regular size Reese's Peanut Butter Cups
16 Oreos
10 oz bag marshmallows (mini ones work best)
5 cups Rice Krispies cereal
3 tablespoons butter

Directions


  1. Create a foil sling by lining a 9x9 pan with foil with a two inch overhang on each side, using two criss crossed foil pieces. Spray sling with non-stick bake spray.
  2. Spread cookie dough evenly in the bottom of the pan so that it is about 1/4 to 1/2 inch thick (this will use about 2/3 of the cookie dough). Place pan in oven and bake for approximately 15-20 minutes or until golden brown. Remove from oven and set aside to cool.
  3. Place excess cookie dough on a cookie sheet and bake according to recipe directions. (I actually made more cookies and chose a few of them to break up for the topping.) Remove from oven and set aside to cool. Once cooled, crush 1-2 cookies to a fine crumb and set aside.
  4. Once cookie crust in pan has cooled, spread half of ganache on top.
  5. Melt butter in a large pot over low heat. Add marshmallows, and stir until completely melted. Add in Rice Krispies, and stir until well-combined. Spread half of the Rice Krispies mixture over ganache.
  6. Place a layer of Reese's Peanut Butter Cups on top of Rice Krispies layer. Next, place an Oreo on top of each Reese's cup. From there, spread remaining Rice Krispies mixture on top.
  7. Spread remaining ganache on top, and sprinkle with crushed cookies.


Chocolate Ganache
8 oz. bittersweet chocolate, chopped
3/4 cup heavy cream
2 tablespoons butter

Place chocolate in a heatproof bowl. Place cream in a small saucepan over medium heat and bring to a boil. Pour boiling cream over chocolate. Gently stir until chocolate is completely melted and shiny, about 2 minutes. Set aside to cool and thicken at room temperature about 1-2 hours.

Monday, March 17, 2014

Happy St. Patrick's Day!

I hope everyone had a great St. Patrick's Day weekend and is out there wearing green today! I celebrated by going to a potluck brunch with friends and then heading downtown to see the Chicago River in all of its green glory. The river is really as neon green as it appears in the photos (check out this nifty time lapse of the river being dyed green if you don't believe me).

I went a little nuts with the St. Patty's Day baked goods this weekend, but I think my favorite recipe out of all of them was this one for Bailey's Chocolate Chip Cookies. Unlike some recipes that say they contain an ingredient but don't actually taste anything like said ingredient, these cookies are chock full o' Irish creamy goodness. The smell of Bailey's will absolutely permeate your house while the cookies are baking. I hope you enjoy them as much as I did!


Bailey's Chocolate Chip Cookies

From Gimme Some Oven

Makes about 6 dozen cookies


Ingredients

1 cup butter, softened
1 1/2 cups granulated sugar
2 eggs, beaten
1 tsp vanilla extract
2 2/3 cups flour (I used 2 cups all purpose and 2/3 cup whole wheat)
1/2 cup unsweetened cocoa powder
1 1/4 tsp baking soda
1/4 tsp salt
8 Tbsp. Bailey's Irish Cream
1 cup white chocolate chips

1. Preheat oven to 350 degrees Fahrenheit.
2. In a medium-sized bowl, whisk together flour, cocoa powder, baking soda, and salt until well combined.
3. Using an electric mixer, cream together butter, sugar, eggs, and vanilla until fluffy. Add in the Bailey's one tablespoon at a time, scraping down the sides of the bowl to be sure that everything is well combined.
4. Gradually add the dry ingredient mixture, scraping down the sides of the bowl as needed, and continue mixing until well-mixed. Fold in white chocolate chips.
5. Drop the dough by the tablespoon onto a greased baking sheet, spacing the cookies 2 inches apart. Bake for 8-10 minutes (center will still be slightly soft but will set as the cookies cool). Let sit 3 minutes on cookie sheet before transferring to a cooling rack.

I enjoyed them so much that I could barely keep it together for the photo shoot.

Thursday, March 6, 2014

Black Forest Cupcakes

Happy Thursday, everyone!

I can tell it's going to be one of those days that just sort of drags on. I basically started counting down to my department's weekly 4 PM coffee hour as soon as I got to my desk this morning. Usually, I can tell what kind of day it will be by how early in the day I realize that it's Thursday and therefore, coffee hour day. On a good day, I make it to 3:45 and then remember "oh man! Thursday! Awesome!." On the less-than-great days, I realize that it is Thursday immediately and begin the 6 hour countdown. Ooof.

In honor of coffee hour, I'm bringing out another recipe that I made for one of our department functions - in this case, the MatSci holiday party. As much as I like making complicated, homemade recipes, sometimes I really just want to make things from a box. There's no better way to handle dessert if you're cooking for a crowd, especially a not-very-discerning crowd (aka a department of people who will eat just about anything) than dumping a bag of mix into a bowl and throwing in some eggs and water. There is no shame in this, as boxed cakes and brownies are almost as good as the real thing with a fraction of the effort. Fancied up cake mixes (e.g. adding pudding, chocolate chips, and the like) are one of the easiest ways to take something simple and give it a little bit of oomph.

This black forest cupcake recipe comes from my first foray into making filled cupcakes. I really wanted to make a simple, cherry-filled cupcake. Most every recipe on the interwebs seemed to have a compote component, unnecessary chopping, or nonsense like this involved. That sort of defeats the whole purpose of making something easy, no?

I decided to go semi-homemade here, and the resulting recipe is as easy as it gets. Cake mix. Pie filling. A little mixing to make a super simple whipped cream frosting. The results are amazing for how easy it is. You can say you made it from scratch. I won't tell. :)


Black Forest Cupcakes

Cupcake recipe/filling: S&C original
Frosting from Hoosier Homemade


Cupcakes
1 package devil's food cake mix (preferably with pudding in the mix or if not, add a small box (~3.4 oz) of chocolate pudding yourself)
20 oz can of cherry pie filling

Frosting
1 1/2 cups heavy whipping cream, cold
6 tablespoons powdered sugar
1 teaspoon vanilla extract
Red sprinkles and cocoa powder (optional, but awesome)

Instructions

Cupcakes

1. Line a regular-sized cupcake tin with baking cups. Prepare cake mix as recommended on the box. Pour into cupcake liners, and bake as directed. Let cool completely.
2. Using a knife or a cupcake corer, remove the center of each cupcake. (See my tutorial if you need help) KEEP THE REMOVED CUPCAKE CENTERS. You will put them on top of the cherries to prevent the filling and frosting from mixing and turning pink.
3. Fill each cupcake with about 1 tablespoon of cherry pie filling (2-3 cherries worth of filling). Gently press down on the filling to get it further into the cupcake.
4. Place the cupcake center removed in step 2 on top of the filling, and press it gently into place. It is okay if it sticks up a little bit.


Frosting

1. Pour whipping cream into a large mixing bowl, and beat on medium until it starts to thicken.
2. With the mixer running, add powdered sugar 1 tbsp at a time. Once all the powdered sugar has been added, beat on high until stiff peaks form, being careful not to overbeat the mixture.
3. Fold in vanilla extract.
4. Using a piping bag with a large tip (2A or 1A) or a gallon-sized ziploc bag with the corner cut off, pipe the frosting into a swirl on top of each cupcake. Top with red sprinkles and cocoa powder. Keep cold until ready to use to maintain integrity of the frosting.

Note: I would recommend making these at most one day prior to their consumption, as the cake will absorb some of the cherry filling overnight. You don't want them to get soggy!


Wednesday, October 9, 2013

Almond Butter Granola AND Peanut Butter Granola

Okay, how come nobody told me how easy and awesome it is to make your own granola? Seriously, kids, where has this been all my life?

Most of the recipes I've found online involve lots of oil (isn't granola supposed to be healthy-ish?) or laborious stirring, to which I am greatly opposed. I found these two recipes on the site Peanut Butter Fingers (which is a really great read, by the way), and they couldn't be easier. I'm partial to the peanut butter version, but both are very yummy and great to eat with yogurt or by the handful. You're just 15 minutes away from delicious crunchiness!

 Giant clusters!


Almond Butter Granola

From Peanut Butter Fingers
Makes about one cup of granola (I halved the original recipe)

Ingredients:
2 tbsp. almond butter
2 tbsp. honey
1/4 tsp. cinnamon
1/4 tsp. vanilla extract
1 tbsp. chia seeds (optional, but a nice healthy addition!)
1 c. old fashioned oats (not quick cooking!)

Directions:

  1. Preheat oven to 325 degrees F and spray cookie sheet (I used a jelly roll pan with edges for fear of dropping the granola everywhere) with cooking spray.
  2. Combine almond butter and honey in a bowl and microwave until almond butter is slightly melted (about 30 seconds). Stir almond butter and honey together.
  3. Add cinnamon and vanilla to almond butter mixture.
  4. Stir oats and chia seeds into almond butter mixture, completely coating oats in the mixture.
  5. Spread oats onto cookie sheet and bake for eight minutes before tossing oats and baking for another eight minutes until granola is slightly brown.
  6. Let cool until granola is crunchy (it might not be immediately crunchy when you take it out of the oven, but give it time and it will be) and enjoy!


Almond butter granola

Peanut Butter Granola

From Peanut Butter Fingers
Makes about one cup of granola

Ingredients:
2 tbsp. creamy peanut butter
2 tbsp. honey
1/4 tsp. cinnamon
1/4 tsp. vanilla extract
1 c. old fashioned oats

Directions:

  1. Preheat oven to 325 degrees F. Spray cookie sheet/jelly roll pan with non-stick cooking spray and set aside.
  2. Combine peanut butter and honey in a bowl and microwave until peanut butter melts (approximately 20 seconds). Stir.
  3. Stir cinnamon and vanilla into peanut butter and honey mixture.
  4. Add oats and stir until oats are completely covered in peanut butter mixture.
  5. Spread out oat mixture onto prepared cookie sheet and bake for 15 minutes or until granola is slightly browned. Stir the granola once halfway through baking.
  6. Let cool until granola is crunchy and eat!

Monday, September 30, 2013

Pumpkin Season is Here!

The temperatures are a bit cooler, the days a bit shorter, and the trees a bit crunchier. That snap in the air can only mean one thing... 

Pumpkin. EVERYTHING.

I know some people out there are very anti-pumpkin and think the pumpkin-flavored trend is overrated and overdone.

Let me tell you up front that I am not one of those people.

This weekend, Andy and I headed to Trader Joe's for my annual pumpkin-flavored stock up. The results were epic.

For those of you keeping score at home, that is TWO jars of pumpkin butter and TWO containers of pumpkin yogurt. 

I purchased so much pumpkin-themed stuff in one swoop that even the guy at the register commented that I wasn't messing around with the pumpkin. I got the last can of chai, which I wasn't able to get at all last year, but I was merciful and left one jar of pumpkin butter on the shelf for some other like-minded individual. This stock up is on top of the things I've already amassed so far this season (pumpkin flax granola from Costco, Dunkin' Donuts pumpkin spiced coffee, etc.). I may have a slight addiction, but now, I am set for the rest of the year. 

I also learned that this is a thing and is conveniently located next to the pumpkin butter. Apple butter is another fall favorite of mine, and I'm excited to try this version.

Om nom nom.

In honor of the beginning of pumpkin spice season, I experimented with this twist on a traditional snickerdoodle, one of my favorite cookies of all time, which substitutes pumpkin pie spice for the mix of cinnamon and a hint of nutmeg that I use normally. I thought that the recipe as written was a little dry, so I added some more liquid to make the dough easier to handle and a bit more moist. They were a big hit at home and at a housewarming party that I attended this weekend. Happy fall!


Pumpkin Spiced Snickerdoodles

Adapted from Skinnytaste
Makes 24-30 cookies


1 cup whole wheat flour (I used white whole wheat, but either is fine)
3/4 cup all-purpose flour
1/2 tsp baking soda
1/2 tsp cream of tartar
1 cup sugar
1/4 cup butter, softened
1 tbsp honey
1 tsp vanilla extract
1 large egg
1/4 cup milk (or water)
3 tbsp sugar
1 tbsp pumpkin spice

Preheat oven to 375°F.  Line two baking sheets with parchment paper or spray generously with cooking spray.

Combine flour, baking soda, and cream of tartar in a medium bowl, stirring with a whisk.

In a large bowl, combine 1 cup of sugar and butter; beat with a mixer at medium speed until well blended. Add the honey, vanilla, egg, and milk; beat well.  Gradually add the flour mixture to the sugar mixture, beating until just combined.  Cover and chill for at least 10 minutes. (The chilling step is very important and will make your cookies and your life better, so don't skip it!)

The dough after chilling. 

In a medium bowl, combine 3 tbsp sugar with pumpkin pie spice, stirring with a whisk to combine. With moist hands (also very important!), shape dough into balls about 1 inch in size. Roll balls in sugar/pumpkin pie spice mixture until covered. You will probably have some of the sugar/pumpkin pie spice left over after this step. 


Place balls 2 inches apart onto baking sheets.


Slightly flatten each ball by pressing down gently with a fork.


Bake 375°F for 6-8 minutes (cookies will be slightly soft but the edges should have started to set).  Cool on baking sheets for 2 minutes.  Remove from pans to cool completely on wire racks.


Wednesday, September 18, 2013

Good for You Chocolate Lava Cake

I'll get right to it: chocolate lava cakes are awesome. However, they have never had the reputation of being good for you. Even if you make them at home, the average lava cake will have hundreds of calories for an itty bitty serving. What's a chocolate-loving girl to do about this conundrum?

After much searching of the internet, I found this recipe for a "Guilt Free Lava Cake for One," and unlike most "healthy" recipes you see around these days, I could make it with the ingredients I had on hand. Glorious!

I really don't like using the word "guilt" when it comes to food. I don't think we should ever feel guilty about eating. Our bodies need need food, after all. However, healthy isn't exactly the right word for this dish, either, because despite what the internet might tell you, desserts aren't exactly health food, even if they contain whole grains, coconut oil, powdered unicorn horn, or what have you.

I'm going to call this recipe "Good For You Chocolate Lava Cake" because it is nutritionally MUCH better for you than traditional lava cakes and let's be real - chocolate just makes you feel good inside.

The cake is lava!

I can't wait to try this recipe with flavored yogurt instead of plain yogurt. Raspberry? Coffee? Vanilla? The possibilities are endless. This recipe makes one cake, but it can easily be doubled, quadrupled, etc. to make as many cakes as you have ramekins.


Good For You Chocolate Lava Cake

Modified slightly from Girl Who Bakes

Yields one cake

1 tablespoon white whole wheat flour
1 1/2 tablespoon all-purpose flour
1 1/2 tablespoon granulated sugar
1 heaping tablespoon cocoa powder
1/8 teaspoon baking soda
pinch of salt
3 tablespoons non-fat milk
1 tablespoon non-fat Greek yogurt (or any non-fat yogurt)
1/4 teaspoon vanilla extract

Directions:

1. Preheat oven to 350 degrees F.

2. In a small bowl, whisk together flours, sugar, cocoa, baking soda, and salt.

3. In a separate bowl, mix milk, yogurt, and vanilla, making sure to get rid of any yogurt lumps.

4. Pour wet ingredients into bowl of dry ingredients, and stir until combined and smooth.

5. Generously spray an individual-sized ramekin with cooking spray. Pour batter into ramekin. Place on a cookie sheet, and bake for 12-16 minutes (I usually need about 14 minutes) or until edges and top of cake are set. The center will still be a little jiggly to the touch.

6. Let cake cool for 1 minute. Place a small plate on top of the ramekin. Invert the plate and gently lift off the ramekin.

7. If desired, garnish with berries, whipped cream, or ice cream. Enjoy!


Sunday, September 15, 2013

How to Make Filled Cupcakes

Since I've mentioned this technique a few times in my recipes, I thought that making an instructional page on how to make filled cupcakes might be useful, especially because it seems super intimidating if you've never done it before (spoiler alert: it's not that hard!). Just a little bit of extra work can take your cupcakes from awesome to over-the-top.

Materials:
  • A sharp knife (my preferred method) or cupcake corer (I use a small biscuit cutter for this purpose)
  • Your cupcake, cooled
  • Your filling, cooled


Procedure:

1. Remove the center of your cupcake.

If using a cupcake corer, gently twist the cutter into the top of the cupcake while applying gentle pressure, trying not to squash the cupcake in the process. To remove the cake, pull gently on the top of the corer, twisting a bit to separate the center of the cake from the rest of your cupcake.


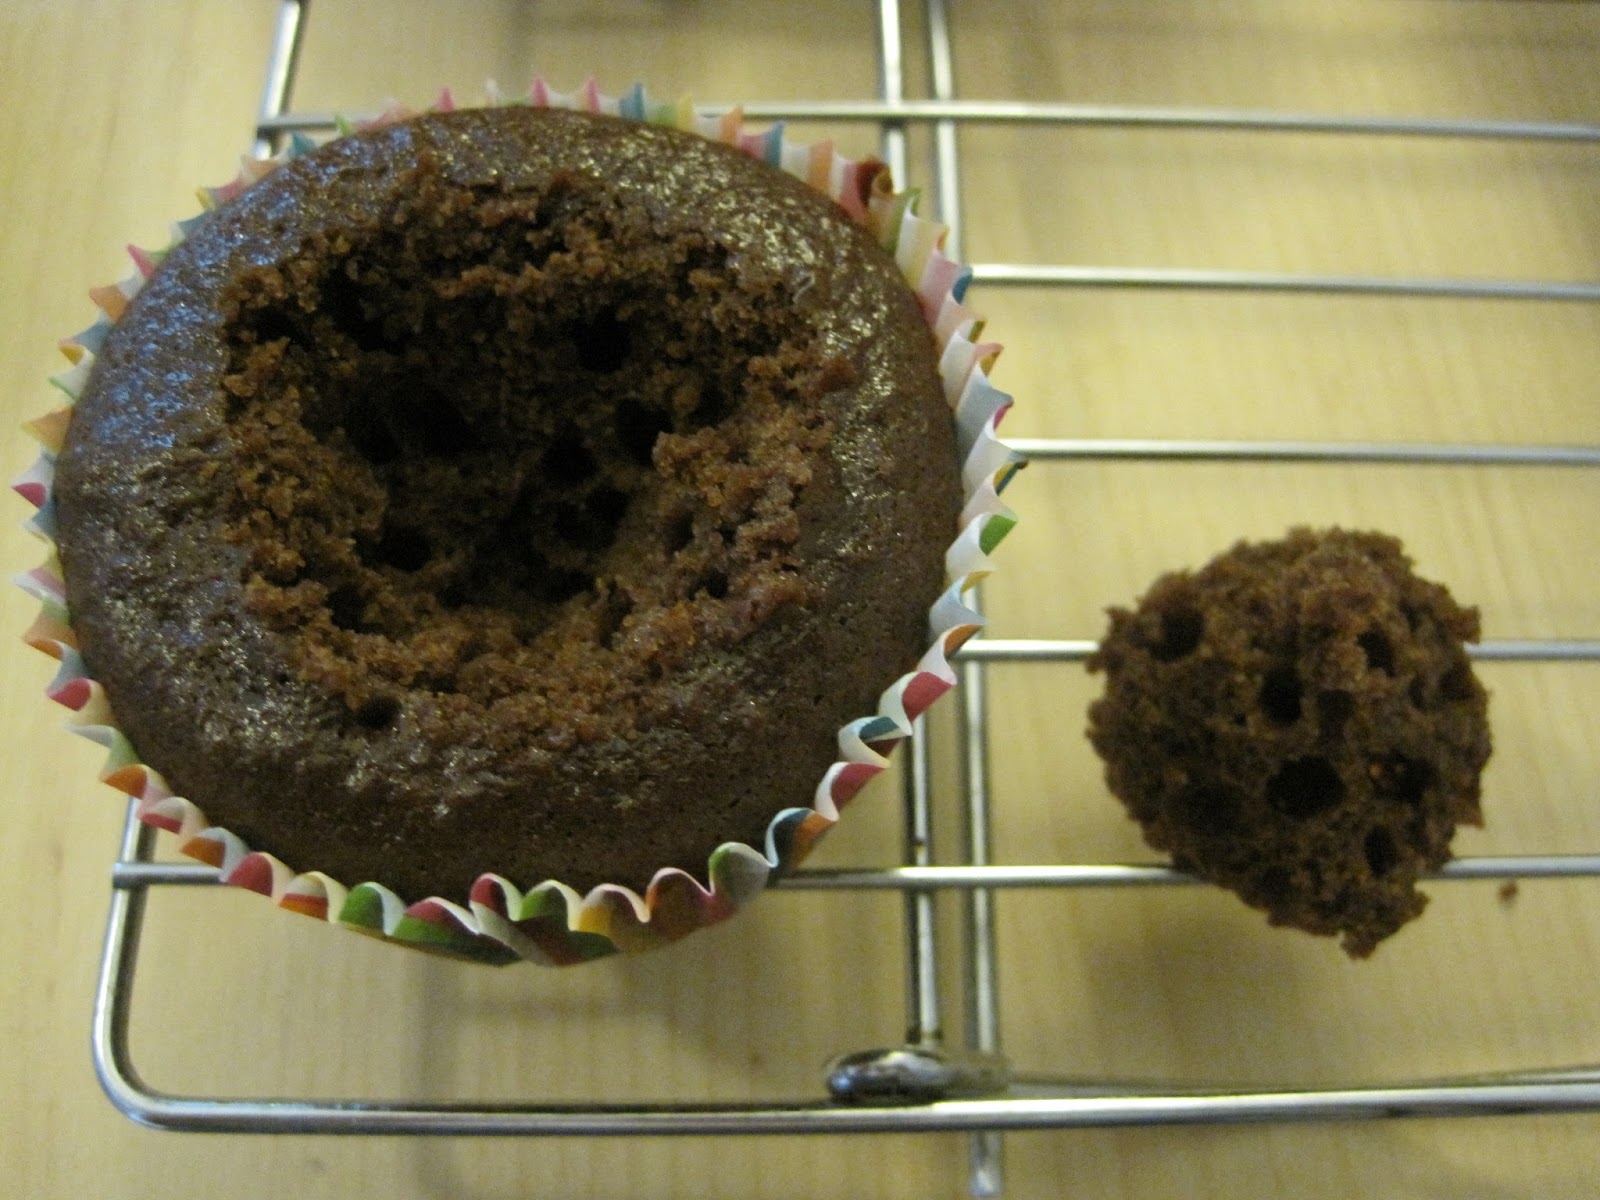
If using a knife, place the knife at a 45 degree angle to the surface of your cupcake. Gently cut a circle out of the top of the cake, maintaining a 45 degree angle with your knife until you've cut all the way around to make a cut out in the shape of a cone. Gently lift out the cone.


This extra cake can either be eaten (RIGHT NOW), discarded (lame), repurposed (I've made cake balls out of the extra cake!), or used to cork your cupcake if you have a particularly tricky filling (like something with fruit that could look lumpy) or a liquidy frosting (like a glaze). More on this option in a second.


2. Fill your cupcake.

If you do not plan to replace the piece of cake that you removed in step one, fill your cupcake so that the filling is level with the top of the cake. You may even want to extend the filling over the edges a bit to make the surface flat. 


If you would like to put the cake center back on top of the filling, fill the cupcake about 3/4 full, leaving a bit of room for the displaced cake. Put the cake back in the center, gently pressing down to put it back into place. It will not be exactly level, but try to do the best that you can to get it securely in place.


3. Frost your cupcake.

Let the cupcake sit for 10 minutes or so to let your filling settle into its new surroundings. Your cake may absorb some filling, meaning you need to add a little bit more to get it to be level with the top. Also, if you have a liquidy filling, frosting the cakes immediately after filling may cause some of the filling to get carried along with the frosting, resulting in a swirl of your filling in your frosting.

After waiting a bit, frost the cupcake with your frosting of choice, making sure to cover any seams from the filling process. 


4. Bask in the praise of your cupcake audience. 

See that wasn't so bad, was it? I knew you could do it! 

Monday, August 26, 2013

Raspberry Truffle Cupcakes

I have a confession.

I had never been to Sprinkles Cupcakes until a few weeks ago.

As a person with a blog called "Science and Cupcakes," I was ashamed. A long standing wrong has finally been righted.

After a lovely orchestra concert in Millennium Park one Friday night, a few friends and I headed over to Sprinkles' Chicago location at the request of my friend Elizabeth. It was after hours, but never fear!


Cupcake ATM to the rescue!

If you get a hankering for a cupcake after the Sprinkles storefront is closed, there's a cute little kiosk just outside the entrance where you can buy a cupcake from a refrigerated vending machine-type apparatus. It comes in its own adorable little box, and you get to watch it being plucked from the shelf when you buy it.

Andy got a raspberry cupcake with raspberry frosting, and I got the vanilla milk chocolate cupcake with chocolate cream cheese frosting and chocolate sprinkles. Oh my gosh. They were moist, rich, and delicious. Other favorites among our purchases included chocolate marshmallow and black & white.

After finishing our desserts, Andy commented that it would be awesome if the raspberry frosting was on a chocolate cupcake instead of just a regular raspberry cake.

Behold, inspiration!

After consulting The Google, I found this recipe for raspberry truffle cupcakes, which I modified slightly based on what I like/what I had around the kitchen. I used a different buttercream frosting and used Fage Total 0% Greek yogurt instead of sour cream. They were decadent and delicious, and I think I polished off most of them by myself. Who would want to share when they came out so well?

P.S. I am working on a tutorial on how to make filled cupcakes, so look for an instructional post coming soon!

Eat ALL of the chocolate.

Raspberry Truffle Cupcakes

Modified from Kitchen Simplicity
Makes ~18 cupcakes

Chocolate Cupcakes

1.5 cups all-purpose flour (I used white whole wheat)
1/2 cup white sugar
1/2 cup brown sugar, packed
3/4 teaspoon baking soda
1/4 teaspoon salt
2 oz. bittersweet or semisweet chocolate, finely chopped
2 tablespoons unsalted butter, softened
1/4 cup unsweetened cocoa powder
1/2 cup boiling water
1 teaspoon vanilla extract
1/2 cup nonfat Greek yogurt
1/2 cup low fat buttermilk
2 large eggs, lightly beaten

Preheat oven to 350 degrees.

In a medium bowl, sift flour, sugars, baking soda, and salt through a fine-mesh sieve. Set aside.

Place chopped chocolate, butter, and cocoa into a large bowl. Pour boiling water over ingredients, and without stirring, let sit for 2 minutes. After 2 minutes, stir until smooth. Whisk in vanilla, yogurt, buttermilk, and eggs until well combined. Add dry ingredients, whisking until smooth.

Spoon 1/4 cup batter into regular-sized muffin tins prepared with cupcake liners. Bake for 20 minutes or until toothpick inserted into the center comes out clean. Let cool 5 minutes before removing to cool on a wire rack. Cool cupcakes completely.


Raspberry Ganache

5 oz. semisweet or bittersweet chocolate, finely chopped
1/4 cup seedless raspberry preserves
1/3 cup heavy cream

While the cupcakes are baking, put the chocolate and preserves in a small bowl. In a small saucepan, bring cream to a gentle boil, and then pour over the chocolate and jam. Let stand 3 minutes. Stir until smooth (this might take a little extra effort to get rid of any chocolate chunks!). Allow to cool to room temperature before using. If making ahead, ganache can be stored, covered, in the fridge. If the ganache solidifies too much, it can be reheated in the microwave on medium power for 15 second segments, stirring after each interval.


Raspberry Buttercream Frosting

Recipe halved from The Baking Robot's raspberry buttercream

1/2 cup salted butter, softened
1/4 cup seedless raspberry preserves
2 cups powdered sugar

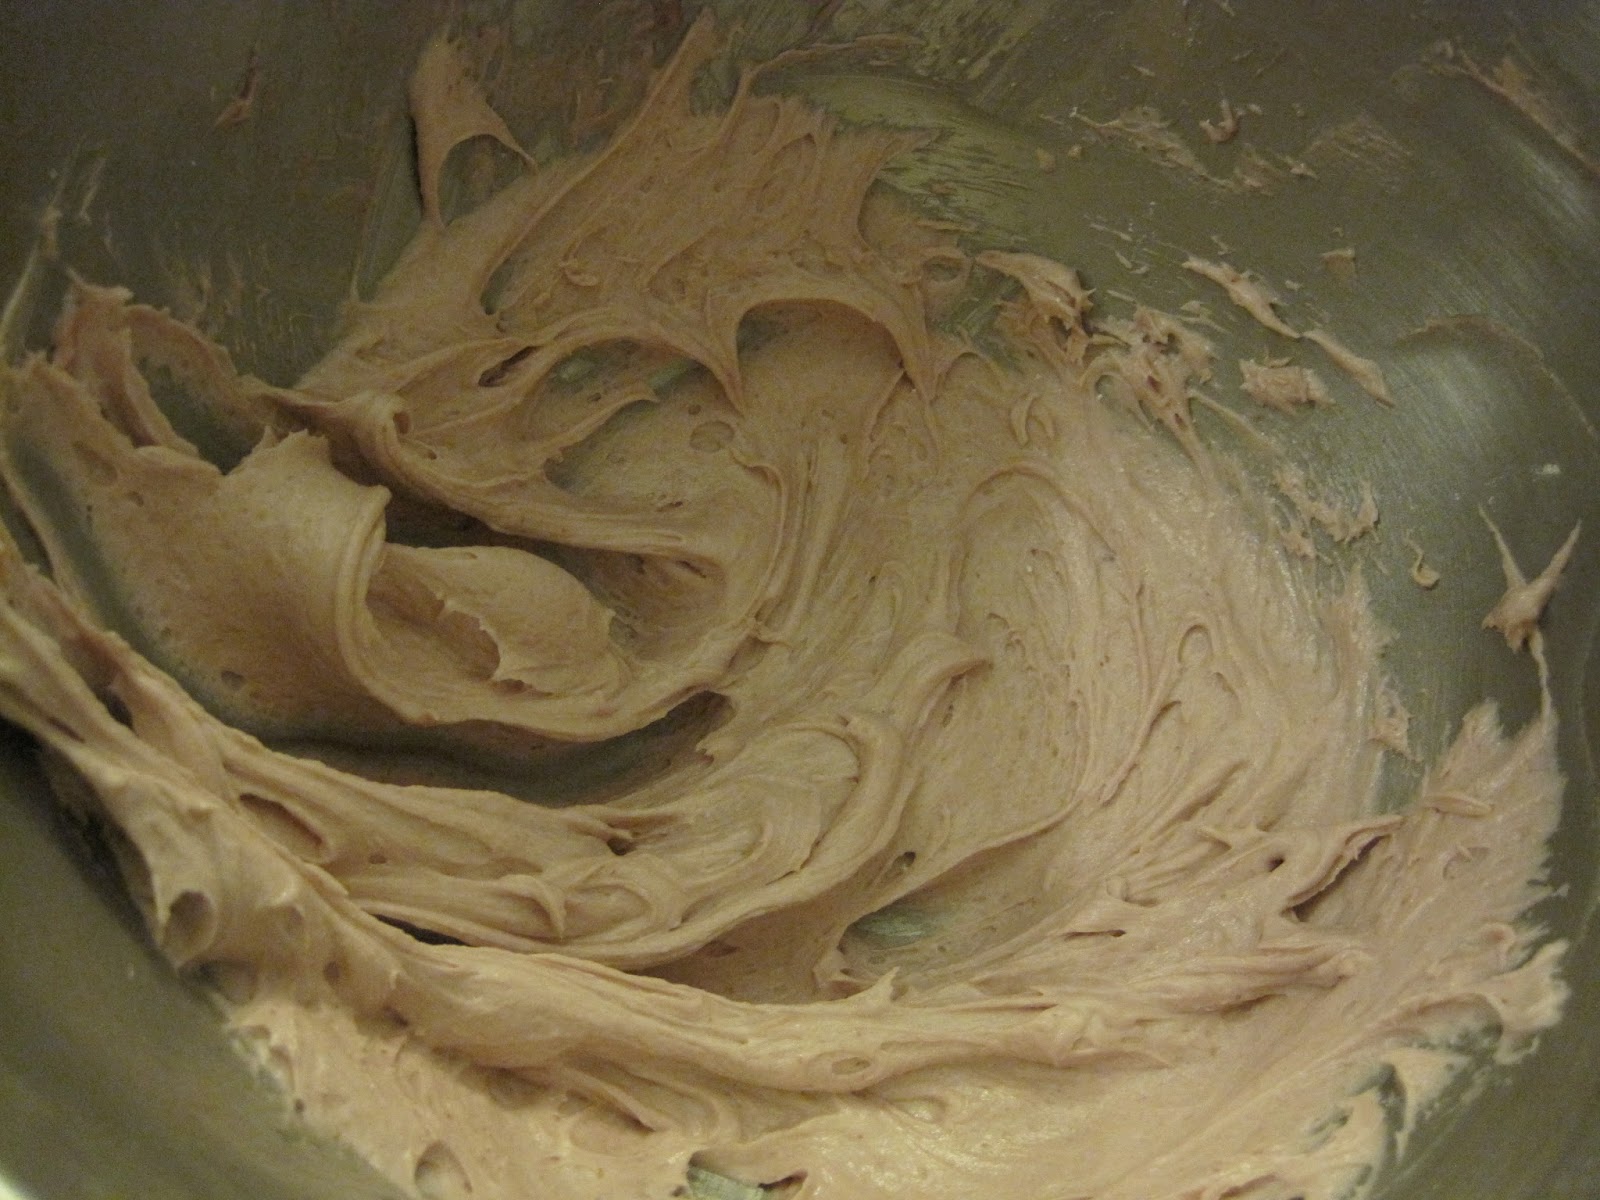
In a stand mixer with the whisk attachment, beat butter and preserves together until smooth and well-combined. Gradually add powdered sugar (about a 1/3 cup at a time), beating after each addition, until frosting has reached a spreadable consistency, scraping down the sides of the bowl as needed.


Assembly!

Once cupcakes have cooled completely, cut a small cone in the top of each cupcake. Keep scraps for another use (I made cake balls!) or discard. Fill cupcakes with chocolate ganache to the top cupcake surface, spreading to make even with the cake (see picture below).


Frost generously with raspberry buttercream, and garnish with a fresh raspberry if desired. Devour.


Sunday, March 17, 2013

Strawberries & Thoughts of Spring

Ladies and gentlemen, I present to you...

the BIGGEST strawberry I have EVER SEEN.

Actual size!

Seriously, though. I couldn't even get my fist to close around the berry because it was SO LARGE.


Godzilla berry!

If the berry crop is this vigorous already, I can only conclude that warmer days are just around the corner! I have to admit, I felt a little betrayed when Punxsutawney Phil decreed an early spring only to get several inches of snow dumped on us in the midst of below-freezing temperatures. Now that things are looking brighter, what better way to get into the springy spirit than with a light (both in texture and in calories) yet decadent muffin?

As I've mentioned before, I love love love breakfast, and I will look for any excuse to make something delicious. Waking up is a little bit easier when you have something tasty waiting for you, amirite?

I changed this recipe slightly to use white chocolate chips rather than mini bittersweet ones (which I'm sure would be great, too), and I used half whole wheat flour, half regular flour. Other than these modifications, I stuck with the recipe just as it is written. It's basically like eating a chocolate-covered strawberry in muffin form. Awesome!


Skinny Strawberry White Chocolate Chip Muffins

Adapted from Sally's Baking Addiction
Yields 10 muffins


Ingredients:

3/4 cup all-purpose flour
3/4 cup whole wheat flour
1/2 teaspoon baking soda
1/2 teaspoon ground cinnamon
1/4 cup granulated sugar
1/4 cup light brown sugar, packed
1/2 cup + 2 tablespoons unsweetened applesauce
1 egg white, beaten
2/3 cup diced strawberries
1/3 cup white chocolate chips

Directions:

1) Preheat oven to 350 degrees F. Spray 10 muffin tins with nonstick cooking spray (or use a non-stick muffin tin like I did). 

2) In a large bowl, gently toss the flour, baking soda, and cinnamon. Set aside. 

3) In a separate bowl, mix the brown sugar, granulated sugar, and applesauce until together until no brown sugar lumps remain (a fork works well to break up the brown sugar). Add the beaten egg white and stir gently with a fork or whisk until fully incorporated. 

4) Add the wet ingredients to the dry until just combined - do not overmix. Fold in the strawberries and white chocolate chips.

5) Divide the batter evenly between 10 muffin tins. Bake for 15-20 minutes. Muffins will be lightly golden in color, and a toothpick inserted in the middle of a muffin should come out clean.

6) Let muffins cool in the muffin tin for about 5 minutes. Remove muffins to wire rack to finish cooling. Enjoy!


The finished product


Sunday, March 3, 2013

Post-Qual & Baking with Ricotta

Hello, good people of the internet!

I know, it has been a good long while since I've posted anything. I have an excuse, I promise. At the beginning of February, I had my qualifying examination, which basically determined whether or not I got to become a PhD candidate. Gulp. I wrote a 20+ page qualifying document and presented a 30 (plus interruptions) min talk on what I've done, what I plan to do, and why I should be kept around for the duration of my PhD. Also, I shamelessly bribed my committee by making my crowd-pleasing whole wheat cherry scones.

I am happy to report that I passed(!) my exam, and Northwestern is stuck with me for a few more years. Woo! Since then, I've been keeping busy with lots of research stuff. There's no rest for the weary!

While I was working on my qual, I developed a habit of "stress baking" where when I just couldn't look at my paper anymore, I would go bake something. My research group gratefully accepted my offerings, as you can imagine.

The most exciting adventures during this time involved, of all things, ricotta cheese. I had a bunch of ricotta leftover from a Skinnytaste baked pasta recipe because when you buy ricotta cheese, it has to be in a half pound container or larger, even if you only need a 1/4 cup. Blah. Fortunately, I was inspired to use up the cheese, which led to the two recipes below.

I brought the orange ricotta muffins with me to Bloomington, IN where I visited my friend Lindsay for a weekend post-qual. They were met with rave reviews, so you have assurance that they are delicious from a non-biased source. The lemon cookies were one of the offerings that my lab received, and the cookies I brought in were gone in a matter of hours. I hope you enjoy these recipes as much as I did!

Side note: I finally joined Pinterest against my better judgement. I'm addicted. :) Click on the link above to follow me!


Orange Ricotta White Chocolate Chip Muffins

Yield: 12 muffins
Adapted from Two Peas & Their Pod

1 cup all-purpose flour
1 cup whole wheat flour
1/2 teaspoon baking powder
1/2 teaspoon baking soda
1/2 teaspoon salt
1 cup granulated sugar
Zest of 1 orange (I bought navel oranges, so I had A LOT of zest. To me, this is a good thing.)
1/2 cup unsalted butter, at room temperature
1 cup low-fat ricotta cheese
1 large egg
1 tablespoon orange juice
1 teaspoon vanilla extract
1 cup white chocolate chips

For the glaze:
1 cup powdered sugar
1/2 teaspoon orange zest
2 tablespoons orange juice

Directions:
1. Preheat oven to 350 degrees F. Line 12 muffin cups with paper liners. Set aside.

2. In a medium bowl, whisk together the flour, baking powder, baking soda, and salt. Set aside. In a small bowl, add the sugar and orange zest. Rub the orange zest and sugar together with your fingers.
3. Using an electric mixer, beat the butter and sugar and orange zest mixture together until light and fluffy, about two minutes. Add the ricotta cheese and beat until smooth. Beat in the egg, orange juice, and vanilla extract.

4. Add the dry ingredients and mix until just blended. Stir in the white chocolate chips. Divide the batter evenly between the 12 muffin cups.

5. Bake muffins for about 18-20 minutes, or until the tops are slightly golden brown. Let muffins cool completely.

6. While the muffins are cooking, make the glaze. In a medium bowl, whisk together powdered sugar, orange zest, and orange juice. Drizzle glaze over muffins. Let the muffins sit until glaze hardens.


Lemon Ricotta Meltaways

Yield: About two dozen cookies
Adapted from Secret Life of a Chef's Wife


Cookie:
1/2 cup unsalted butter
3/4 cup gran­u­lated sugar
1 large egg
1/2 tea­spoon almond extract
2 tablespoons lemon juice
3/4 cup low-fat ricotta cheese
2 1/2 cups all-purpose flour
1 tea­spoon bak­ing powder
1/2 tea­spoon bak­ing soda
1/4 tea­spoon salt
zest from 1 lemon

Lemon glaze:
1 cup pow­dered sugar
2 table­spoons fresh lemon juice
Instruc­tions

Preheat oven to 350 degrees F. Line cookie sheets with parchment paper. Set aside.

Cream together the but­ter and gran­u­lated sugar in a mix­ing bowl fit­ted with a whisk. Add the egg and mix well. Add the ricotta cheese, almond extract, and the lemon juice. Blend well.

Mix the dry ingre­di­ents and lemon zest together in a separate bowl, and and add them to the butter mixture. Mix until incor­po­rated without over-mixing.

Roll dough into balls, and place about two inches apart on cookie sheet. Using the bottom of a glass covered with flour, flatten each cookie into a circle.

Bake for 14 minutes. (The original recipe only called for 8 minutes, but my cookies were raw at that time. I needed a much longer baking time, but be sure to check on your cookies periodically for doneness!) The cook­ies will begin to brown on the bot­toms, but not the tops.

Let rest 2-3 minutes on sheet, and then remove to cooking rack. Let cookies cool completely.

For the glaze:
Mix ingredients together in a bowl, and driz­zle on cooled cook­ies.


Saturday, November 10, 2012

Pumpkin Bonanza!

Well, folks, it was a late night in the lab yesterday. I had to run a long furnace experiment (and had to go into lab today to finish it blah), and while I waited, I decided that I should tell you good people about all of the delicious fall baking I've been doing lately. I noticed that even though I included cupcakes in the title, my blog is definitely lacking in baked goods. Worry not...this sad fact will change in the coming chilly months.

My research group had coffee hour last week, which I always use as an excuse to go a little crazy with the baking. I made some apple cinnamon muffins (not as interesting) as well as a few pumpkin dishes (more interesting).


These pumpkin pie bars are a fun, easy twist on pumpkin pie. They're sort of halfway between pumpkin pie and pumpkin cheesecake. The only modification I made was to decrease the amount of the topping/crust to 3/4 of the original recipe. Since they turned out so well, I made another bunch for a "practice Thanksgiving" that my friends Lauren and Kellie had at their place on Saturday. Our lovely hosts made the turkey, mashed potatoes, and stuffing, and everyone else brought sides, desserts, and appetizers. There were great friends, great food, and great times all around. :)

Even though the bars were well received, the star of the show was something I made on a whim: pumpkin spice puppy chow. No, not like the stuff by Purina. This kind of puppy chow (aka muddy buddies in some places). If you haven't had it before, a very important piece of your childhood is missing, so go make yourself some. Right now. I'll wait.

The recipe for the pumpkin spice version replaces the peanut butter with Biscoff spread. However, since I couldn't find that, I used Trader Joe's Speculoos Cookie Butter, which is basically heaven in a jar. Seriously, the clouds will open up and angels with trumpets will appear when you first taste it. Couple that with some white chocolate and pumpkin pie spice, and you have a deliciously addictive snack. (I may or may not have eaten all of the puppy chow left over from coffee hour...but you have no evidence of this, do you? Mwahaha.) Puppy chow is super easy, and this version really seemed to be a crowd pleaser. Try it at home!

A little bowl of heaven

Also, not quite as heavenly as speculoos butter but still quite delicious is Trader Joe's Pumpkin Butter. (I swear I'm not paid by TJ's in any way) It's like apple butter...but with pumpkin. I'm really digging it stirred into Greek yogurt with some granola.

The triumvirate

Once I discovered exactly how nutritionally sparse the PSL from Starbucks is, I've tried to avoid them (sigh). Thus, I sought to make my own. This recipe from Skinnytaste is an excellent substitute which uses the pumpkin butter...and it's super easy! Also, I can make mine more pumpkin-y if I want to without having to learn the language of Starbucks to get my order across. Be your own barista!

Starbucks, eat your heart out!

To use up the last of my pumpkin as well as some walnuts and applesauce I had lying around, I made a small batch of pumpkin nut muffins. They are moist and delicious and a festive way to use up any extraneous gourd you may have hanging out in your fridge.


As much as I love pumpkin, I'm super excited for the next season in line: peppermint! I think I saw some seasonal items popping up on menus already, so it's just around the corner! What's your favorite seasonal flavor?