Showing posts with label easy. Show all posts

Tuesday, July 7, 2015

Back from the dead and a super simple drink recipe!

I am ashamed to admit that the last post I put on here is from when it was still snowing. However, the temperature is in the 60s today in Chicago, so we can pretend that it's more spring than summer, right?

I'm just trying to make myself feel better. :)

The past couple of months have been crazy, mainly because I am in the process of writing my dissertation. I am hoping to graduate with my PhD in a few months, so I'm writing, looking for jobs, and still running experiments.

It's a crazy life.

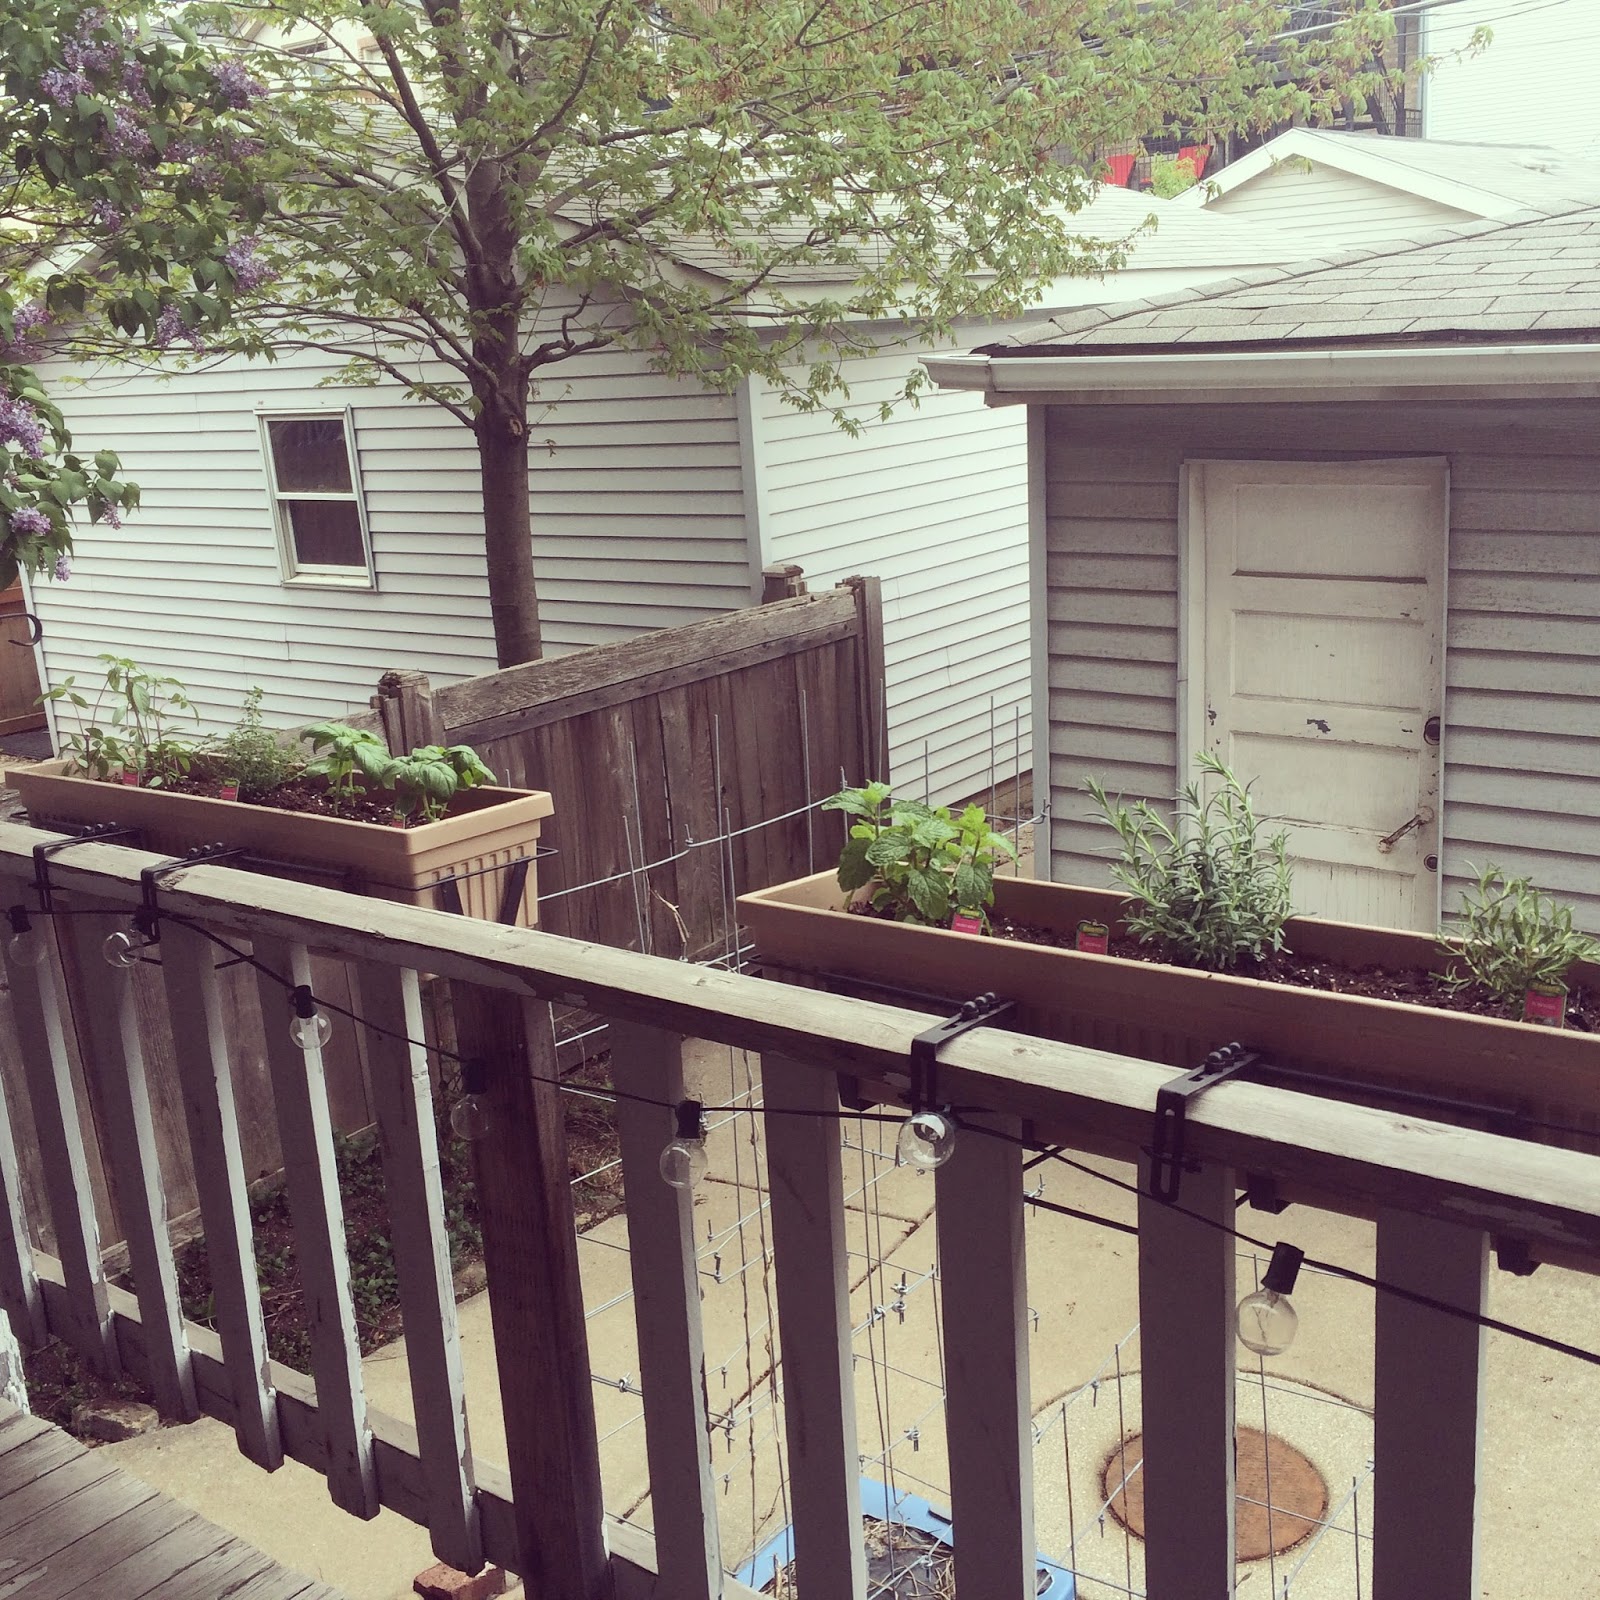
One of the things that keeps me going is my herb garden.


I love having to be creative when you have a bunch of an herb you need to deal with. Herbs always seem to come in droves. You can never just get one sprig of basil. You get an entire bush.

On that note, I have been making a bunch of simple syrups to mix into various beverages for a little touch of summer. Simple syrups require basically no effort, use up tons of herbs, and last for weeks in the fridge. Here is a white iced tea recipe that is super easy and builds on my recipe for lavender simple syrup from a few posts ago. Cold brewing the tea means that this recipe is almost completely hands-off. Also, cold brewing results in a mellower tea that complements the floral notes of the lavender. The taste is light, sweet, and perfectly summer.

Lavender Iced White Tea

A Science & Cupcakes Original


Serves 4

6 bags of white tea
32 oz water
2-3 oz (or to taste, depending how sweet you like your tea) lavender simple syrup

Directions:

1) Add water to a large pitcher. Add the tea bags, making sure to get them completely wet and letting the string and tag hang over the edge of the pitcher. Place the lid on the pitcher (or cover with plastic wrap/aluminum foil if your pitcher doesn't have a lid), securing the strings. This keeps the tea bags in a bunch, making them easier to remove.

2) Place the pitcher in the refrigerator. Let the tea steep overnight or up to 12 hours so that the tea can cold brew.

3) After the tea has brewed, remove the tea bags and discard. Add the lavender simple syrup and stir to combine. Enjoy!


Thursday, February 5, 2015

Slow Cooker Pork Carnitas

On Sunday morning, Chicago woke up to this:


I didn't even want to go outside to take this picture which is why there is obvious window screen visible. 


And it wasn't even done snowing yet! All in all, we got 19.3 inches of snow, the fifth largest storm in Chicago history. The city's reaction? Meh. 

On a day like this, what better way to stay inside and make yourself cozy than by breaking out the slow cooker? Let's make some meat!


For Christmas, Andy bought me the Skinnytaste cookbook, which has so many wonderful recipes and beautiful photos. If you're into cooking at all, I highly suggest picking it up.


This recipe for pork carnitas is super straightforward and super delicious. We served this on warm corn tortillas with broccoli slaw and guacamole, but rice and beans would be great, too! I even ate it for lunch on a toasted English muffin with salsa and spinach.


Slow-Cooker Mexican Pork Carnitas

From the Skinnytaste Cookbook


2 lbs boneless pork shoulder roast, trimmed
1/2 tsp kosher salt

Dry Adobo Rub

1 1/4 tsp ground cumin
1/2 tsp garlic powder
1/2 tsp dried oregano
1/2 tsp plus 1/4 tsp kosher salt
1/4 tsp ground black pepper

6 garlic cloves, crushed (or I used minced jarred garlic)
1/2 c low-sodium chicken broth
2 bay leaves
2 chipotle peppers in adobo sauce, minced (we used 3 because we like it spicy)
1/4 tsp ground cumin

Season the pork all over with the salt. Set a large nonstick pan over medium-high heat, add the pork, and brown on all sides for about 10 minutes. Remove from the heat.

For the dry adobo rub: In a small bowl, combine 1 teaspoon of the cumin, the garlic powder, oregano, 1/2 teaspoon of the salt, and the black pepper.

Using a sharp paring knife, insert the knife into the pork about 1 inch deep and insert the crushed garlic, rubbing any excess over the pork. Rub the pork all over with the dry adobo rub.

Pour the chicken broth into the slow cooker and add the bay leaves, chipotle peppers, and pork. Cover and cook on low for 8 hours. After 8 hours, transfer the pork to a large dish. Discard the bay leaves. Shred the pork using wo forks and return it to the slow cooker with the juices. Add the remaining 1/4 teaspoon cumin and the 1/4 teaspoon salt. Serve.

Note: We had to add additional chicken broth part way through cooking to prevent burning. You may also need to do this, so keep an eye on the level of liquid during cooking.


Sunday, January 18, 2015

Crockpot Mulled Wine

Okay, so technically, the holiday season is over, and all things spiced and fragrant are considered passe. However, it is freezing here in Chicago, which means to me that warm drink season is still in full swing.

I love to make crockpot mulled wine for dinner parties because you can just throw all the ingredients into the slow cooker and forget about it while you are busy preparing everything else. The longer you cook it, the better it gets, so it is basically a foolproof recipe!

This mulled wine is also a very economical way to entertain for a crowd because you can use the cheapest wine you can find, and it will still taste amazing. I used some Three Buck Chuck from Trader Joe's. Just make sure you have a dry red wine, and you're set!

The wine was so popular that I didn't even get a chance to take a picture of it, so you'll have to trust me when I say that it looks very impressive and welcoming!

Crockpot Mulled Wine

Science & Cupcakes Original

Makes approximately 20 servings


3 750 mL bottles of dry red wine (I used Charles Shaw's finest Cabernet Sauvignon)
1 large navel orange, cut into quarters
16-18 whole cloves
4 pieces star anise
6 cinnamon sticks (about 3 or 4 inches long)
1/2 cup brandy
1/4 cup honey
1/4 cup brown sugar, packed
1/4 cup orange juice

Using a knife, make small holes in the peel of the orange. Stick the cloves into the holes. This technique makes it easier to keep track of all of the cloves so that you don't have to fish them out of the wine later.

Add all ingredients to a large crockpot. Cover and cook on high for 4 hours or until ready to serve, stirring occasionally until the honey and brown sugar are dissolved. Drink and be merry.

Tip: If you have cheesecloth, you can also make a little sachet with all of the spices in it. I didn't have this, but it still worked out fine!


Monday, August 11, 2014

I'm back! (and lavender simple syrup)


Friends, friends, friends. I am back from the depths of conferences and wedding planning to bring you a recipe that is entirely summer: simple and fresh. Things have been super crazy here at S&C, as I've gone to two conferences, spent a weekend back in PA, gone on a mini-vacation to Portland and run two 10Ks and an 8K. Phew! This weekend was very low-key, and I'm grateful for the chance to take it easy!

One of my favorite parts of summer is growing herbs on our back porch. Andy and I are really lucky that we are able to have a little bit of our own outdoor space in the middle of a city. We can eat outside at our patio table and enjoy our garden and a nice breeze.

This year, we are growing cherry tomatoes (bruschetta!), basil (pesto!), peppermint (flavored water!), Thai basil (stir frys!), rosemary (everything!), lemon thyme (cake!), and lavender (?!). Lavender is totally new to me, but I figured it would be a fun challenge to use it in my cooking. So far, I have made lemon-lavender tea cakes that were devoured by my labmates as well as lavender simple syrup, which I am going to share with you.


Why was I not aware that simple syrups are so...simple? And that you can flavor them with WHATEVER you want! We have a SodaStream, and I can't wait to make my own lavender soda. And lavender lemonade. And lavender everything.


Lavender Simple Syrup

Science & Cupcakes Original

Makes 1.5 cups


Ingredients


1 cup granulated sugar
1 cup water
1.5 tablespoon fresh lavender flowers/buds (you could also use dried lavender if you don't have fresh)

Instructions

Combine water, sugar, and lavender in a small saucepan. Bring mixture to a boil. Lower heat and let simmer for 5 minutes. Remove from heat, and let cool slightly. Using a fine strainer, remove the lavender leaves from the syrup. Let syrup cool completely, and store in an airtight vessel.


Thursday, March 6, 2014

Black Forest Cupcakes

Happy Thursday, everyone!

I can tell it's going to be one of those days that just sort of drags on. I basically started counting down to my department's weekly 4 PM coffee hour as soon as I got to my desk this morning. Usually, I can tell what kind of day it will be by how early in the day I realize that it's Thursday and therefore, coffee hour day. On a good day, I make it to 3:45 and then remember "oh man! Thursday! Awesome!." On the less-than-great days, I realize that it is Thursday immediately and begin the 6 hour countdown. Ooof.

In honor of coffee hour, I'm bringing out another recipe that I made for one of our department functions - in this case, the MatSci holiday party. As much as I like making complicated, homemade recipes, sometimes I really just want to make things from a box. There's no better way to handle dessert if you're cooking for a crowd, especially a not-very-discerning crowd (aka a department of people who will eat just about anything) than dumping a bag of mix into a bowl and throwing in some eggs and water. There is no shame in this, as boxed cakes and brownies are almost as good as the real thing with a fraction of the effort. Fancied up cake mixes (e.g. adding pudding, chocolate chips, and the like) are one of the easiest ways to take something simple and give it a little bit of oomph.

This black forest cupcake recipe comes from my first foray into making filled cupcakes. I really wanted to make a simple, cherry-filled cupcake. Most every recipe on the interwebs seemed to have a compote component, unnecessary chopping, or nonsense like this involved. That sort of defeats the whole purpose of making something easy, no?

I decided to go semi-homemade here, and the resulting recipe is as easy as it gets. Cake mix. Pie filling. A little mixing to make a super simple whipped cream frosting. The results are amazing for how easy it is. You can say you made it from scratch. I won't tell. :)


Black Forest Cupcakes

Cupcake recipe/filling: S&C original
Frosting from Hoosier Homemade


Cupcakes
1 package devil's food cake mix (preferably with pudding in the mix or if not, add a small box (~3.4 oz) of chocolate pudding yourself)
20 oz can of cherry pie filling

Frosting
1 1/2 cups heavy whipping cream, cold
6 tablespoons powdered sugar
1 teaspoon vanilla extract
Red sprinkles and cocoa powder (optional, but awesome)

Instructions

Cupcakes

1. Line a regular-sized cupcake tin with baking cups. Prepare cake mix as recommended on the box. Pour into cupcake liners, and bake as directed. Let cool completely.
2. Using a knife or a cupcake corer, remove the center of each cupcake. (See my tutorial if you need help) KEEP THE REMOVED CUPCAKE CENTERS. You will put them on top of the cherries to prevent the filling and frosting from mixing and turning pink.
3. Fill each cupcake with about 1 tablespoon of cherry pie filling (2-3 cherries worth of filling). Gently press down on the filling to get it further into the cupcake.
4. Place the cupcake center removed in step 2 on top of the filling, and press it gently into place. It is okay if it sticks up a little bit.


Frosting

1. Pour whipping cream into a large mixing bowl, and beat on medium until it starts to thicken.
2. With the mixer running, add powdered sugar 1 tbsp at a time. Once all the powdered sugar has been added, beat on high until stiff peaks form, being careful not to overbeat the mixture.
3. Fold in vanilla extract.
4. Using a piping bag with a large tip (2A or 1A) or a gallon-sized ziploc bag with the corner cut off, pipe the frosting into a swirl on top of each cupcake. Top with red sprinkles and cocoa powder. Keep cold until ready to use to maintain integrity of the frosting.

Note: I would recommend making these at most one day prior to their consumption, as the cake will absorb some of the cherry filling overnight. You don't want them to get soggy!


Wednesday, October 16, 2013

Granola Goodness Part Two!

As is true with a lot of my recipes, this idea started when I wanted to use up something that I had hanging around in the fridge; in this case, it was some jarred applesauce I had bought to make zucchini bread a week or two ago. Given my granola kick, I wondered if anyone had ever thought to use applesauce in granola instead of oil, like you would do with a cake or other baked good.

Lo and behold, the Google revealed to me that others had this thought, too!

Because I'm still on my pumpkin kick, I used pumpkin spice as my seasoning rather than just plain old cinnamon for some seasonal interest. This recipe is on the sweeter side as far as granolas go, which makes it really yummy for direct snacking and also great on plain greek yogurt with a drizzle of honey. Om nom nom.


 Granola for the whole week!


Pumpkin Spice Applesauce Granola

Significantly altered from Baking Bites

Yields approximately 5 cups of granola


3 1/2 cups old fashioned (NOT quick cooking!) oats
2 tsp pumpkin pie spice
1/2 tsp salt
1/2 cup light brown sugar, packed
1/2 cup unsweetened applesauce (regular, not the chunky kind)
1/8 cup honey
1 tsp vanilla extract
1/2 - 3/4 cup mixed nuts (I used 1/2 cup walnut baking pieces and 1/4 cup sliced toasted almonds)
1/2 - 3/4 cup dried fruit (I used raisins, but cranberries or just about any dried fruit would be great here, too)

1) Preheat oven to 325 F, and line a large baking sheet (or two smaller sheets) with parchment paper.

2) In a large bowl, combine oats, pumpkin spice, and salt. In a separate medium bowl, whisk together brown sugar, applesauce, honey, and vanilla.

3) Pour wet ingredients into dry ingredients. Add nuts and stir to combine. Spread on prepared baking sheet(s) in an even layer.

4) Bake for 20 minutes, then gently stir, rotating the granola from the edges into the middle to ensure even baking.

5) Bake for an additional 20 minutes or until the granola is dry and crispy. It will get crispier as it cools. It might be necessary to stir the granola again at this stage if you need to bake it for a much longer time.

6) Set pan on a wire rack to cool. Once cooled, break up granola as desired, and stir in dried fruit. Store in an airtight container to retain crispiness.


Wednesday, September 18, 2013

Good for You Chocolate Lava Cake

I'll get right to it: chocolate lava cakes are awesome. However, they have never had the reputation of being good for you. Even if you make them at home, the average lava cake will have hundreds of calories for an itty bitty serving. What's a chocolate-loving girl to do about this conundrum?

After much searching of the internet, I found this recipe for a "Guilt Free Lava Cake for One," and unlike most "healthy" recipes you see around these days, I could make it with the ingredients I had on hand. Glorious!

I really don't like using the word "guilt" when it comes to food. I don't think we should ever feel guilty about eating. Our bodies need need food, after all. However, healthy isn't exactly the right word for this dish, either, because despite what the internet might tell you, desserts aren't exactly health food, even if they contain whole grains, coconut oil, powdered unicorn horn, or what have you.

I'm going to call this recipe "Good For You Chocolate Lava Cake" because it is nutritionally MUCH better for you than traditional lava cakes and let's be real - chocolate just makes you feel good inside.

The cake is lava!

I can't wait to try this recipe with flavored yogurt instead of plain yogurt. Raspberry? Coffee? Vanilla? The possibilities are endless. This recipe makes one cake, but it can easily be doubled, quadrupled, etc. to make as many cakes as you have ramekins.


Good For You Chocolate Lava Cake

Modified slightly from Girl Who Bakes

Yields one cake

1 tablespoon white whole wheat flour
1 1/2 tablespoon all-purpose flour
1 1/2 tablespoon granulated sugar
1 heaping tablespoon cocoa powder
1/8 teaspoon baking soda
pinch of salt
3 tablespoons non-fat milk
1 tablespoon non-fat Greek yogurt (or any non-fat yogurt)
1/4 teaspoon vanilla extract

Directions:

1. Preheat oven to 350 degrees F.

2. In a small bowl, whisk together flours, sugar, cocoa, baking soda, and salt.

3. In a separate bowl, mix milk, yogurt, and vanilla, making sure to get rid of any yogurt lumps.

4. Pour wet ingredients into bowl of dry ingredients, and stir until combined and smooth.

5. Generously spray an individual-sized ramekin with cooking spray. Pour batter into ramekin. Place on a cookie sheet, and bake for 12-16 minutes (I usually need about 14 minutes) or until edges and top of cake are set. The center will still be a little jiggly to the touch.

6. Let cake cool for 1 minute. Place a small plate on top of the ramekin. Invert the plate and gently lift off the ramekin.

7. If desired, garnish with berries, whipped cream, or ice cream. Enjoy!


Wednesday, March 20, 2013

Post-St. Patty's Day

Still recovering from St. Patty's Day? You are not alone, my friend. I take this mostly as an indication that I am getting old.

I don't know about you, but my St. Patrick's Day consisted of lots of Guinness and Bailey's, mostly in coffee and brownie form. Our friends Kellie and Lauren had a lovely St. Patty's day brunch with all kinds of delicious noms. Throw some Korean BBQ in there for good measure (I know, not Irish, but a delicious addition to the weekend), and my body is offended by the lack of vegetables over the past week.

(Sizzle)

Chicago does St. Patrick's Day to the extreme. I would compare it to a Penn State football weekend but spread over an entire city.

People wear kilts (isn't that Scottish?) and break out their paddleboards.

For the love of God, do NOT fall into that river.


Some people even take their fanciest cars for a spin.

 The elusive car-boat


There's a parade and bar specials out the wazoo starting at 9 AM and all that, but my favorite part of the weekend is the dyeing of the Chicago river.


Yes, the river is really THAT green.

You see it in pictures, sure, but you always think to yourself that it must be Photoshopped. I say to you, readers, that is the real, non-retouched version. Definitely my favorite!

After a weekend of too many noms, I was looking for a recipe that was healthy but still delicious and sort of decadent. I came upon this recipe from the nifty blog Iowa Girl Eats. I tweaked it a bit based on what I had and what I could get at the store. My favorite modification was the use of roasted grapes rather than fresh cherries. The juices from the grapes act as a sort of dressing when combined with the balsamic reduction, so you don't even have to add anything extra!

This recipe has a few parts to it, but don't be intimidated; they're all simple to do. I broke the recipe down by section so that it is hopefully a little easier to follow. When I made the salad, I reduced the balsamic vinegar while doing the other stuff in the oven, as this part took the longest. I would recommend putting the chicken in the oven first followed by the grapes and then the goat cheese. That way, you have nice warm goat cheese for your salad, and the chicken has had a chance to rest. Alternatively, you can bake the chicken and roast the grapes at the same time if you're in a rush then bake the goat cheese.


Almond-Crusted Goat Cheese Spinach Salad with Roasted Grapes & Chicken

Inspired by Iowa Girl Eats
Serves 2


Balsamic reduction:
1 cup balsamic vinegar

Chicken:
1 boneless skinless chicken breast (about half a pound raw)
Salt
Pepper

Grapes:
2 cups red seedless grapes, removed from stems (about 1/2 to 3/4 lb)
Olive oil flavored cooking spray or olive oil
Salt to taste (1/4 to 1/2 tsp)
Pepper to taste (1/8 to 1/4 tsp)

Goat cheese:
3 oz goat cheese
2 tbsp toasted unsalted sliced almonds (I bought the pre-toasted kind from Trader Joe's)
Olive oil for brushing

4 oz baby spinach (about 4 cups)


For the balsamic reduction:
1) Pour balsamic vinegar into a small saucepan.
2) Heat on medium heat until the vinegar thickens and is roughly the consistency of maple syrup. The sauce will continue to thicken as it cools.
Pro tip: If you have a fan above your stove, turn it on. The reducing vinegar is quite pungent and will burn your nose if you breathe it in!

For the chicken:
1) Preheat oven to 400 degrees F.
2) Place chicken in a baking pan or dish (with sides! Or you'll wind up with chicken juice all over the bottom of the oven and the fire alarm going off. Not that I know this from experience or anything...).
3) Sprinkle with salt and pepper. Flip chicken over and repeat.
4) Bake for 15-20 minutes or until the inside is no longer pink and juices run clear.

For the grapes:
1) Preheat oven to 450 degrees F (or 400 F if you're doing this at the same time as the chicken).
2) Place grapes in a baking dish or on a baking sheet in a single layer.
3) Spray with cooking spray or drizzle lightly with olive oil. Roll grapes around by shaking the pan so that they are coated evenly with oil.
4) Sprinkle with salt and pepper to taste. Roll grapes around again to coat evenly with salt and pepper.
5) Roast in oven until grapes begin to split but before grapes begin to brown, about 15 minutes (slightly longer at 400 F), shaking the pan occasionally to prevent the grapes from sticking.


For the goat cheese:
1) Preheat oven to 400 degrees F. Line a cookie sheet or baking pan with parchment paper.
2) Cut the goat cheese into four rounds ~1/4 in thick. Place on cookie sheet.
3) Lightly brush the tops with olive oil. Sprinkle sliced almonds over the surface of the goat cheese, pressing lightly so the nuts stick to the cheese.
4) Bake 5-7 minutes or until soft and warm.

Assembly!
1) Divide baby spinach between two plates.
2) Top with grapes, chicken, and goat cheese.
3) Drizzle with balsamic reduction and sprinkle with additional almonds if desired.
4) Enjoy!


Sunday, March 17, 2013

Strawberries & Thoughts of Spring

Ladies and gentlemen, I present to you...

the BIGGEST strawberry I have EVER SEEN.

Actual size!

Seriously, though. I couldn't even get my fist to close around the berry because it was SO LARGE.


Godzilla berry!

If the berry crop is this vigorous already, I can only conclude that warmer days are just around the corner! I have to admit, I felt a little betrayed when Punxsutawney Phil decreed an early spring only to get several inches of snow dumped on us in the midst of below-freezing temperatures. Now that things are looking brighter, what better way to get into the springy spirit than with a light (both in texture and in calories) yet decadent muffin?

As I've mentioned before, I love love love breakfast, and I will look for any excuse to make something delicious. Waking up is a little bit easier when you have something tasty waiting for you, amirite?

I changed this recipe slightly to use white chocolate chips rather than mini bittersweet ones (which I'm sure would be great, too), and I used half whole wheat flour, half regular flour. Other than these modifications, I stuck with the recipe just as it is written. It's basically like eating a chocolate-covered strawberry in muffin form. Awesome!


Skinny Strawberry White Chocolate Chip Muffins

Adapted from Sally's Baking Addiction
Yields 10 muffins


Ingredients:

3/4 cup all-purpose flour
3/4 cup whole wheat flour
1/2 teaspoon baking soda
1/2 teaspoon ground cinnamon
1/4 cup granulated sugar
1/4 cup light brown sugar, packed
1/2 cup + 2 tablespoons unsweetened applesauce
1 egg white, beaten
2/3 cup diced strawberries
1/3 cup white chocolate chips

Directions:

1) Preheat oven to 350 degrees F. Spray 10 muffin tins with nonstick cooking spray (or use a non-stick muffin tin like I did). 

2) In a large bowl, gently toss the flour, baking soda, and cinnamon. Set aside. 

3) In a separate bowl, mix the brown sugar, granulated sugar, and applesauce until together until no brown sugar lumps remain (a fork works well to break up the brown sugar). Add the beaten egg white and stir gently with a fork or whisk until fully incorporated. 

4) Add the wet ingredients to the dry until just combined - do not overmix. Fold in the strawberries and white chocolate chips.

5) Divide the batter evenly between 10 muffin tins. Bake for 15-20 minutes. Muffins will be lightly golden in color, and a toothpick inserted in the middle of a muffin should come out clean.

6) Let muffins cool in the muffin tin for about 5 minutes. Remove muffins to wire rack to finish cooling. Enjoy!


The finished product


Monday, December 10, 2012

Overnight Oats in a Jar

After my last post, this little blog has reached over 1600 pageviews! Thanks to everyone who has read my posts. Your support means a lot to me, and I'm glad that I can share my baking and grad school adventures with all of you!

Do you ever have those jars of peanut butter hanging around that only have a liiiiittle bit left at the bottom? You know what I mean. The ones where you can see the peanut butter, but you can't always get to it with a knife/spoon/pretzel/finger.

Look at it sitting in there, mocking me. 

Lo and behold, I have found a solution to this problem: overnight oats.

You may ask yourself, what does this mean? Overnight? Oats? These are two words not normally found together. Basically, overnight oats are a cold version of oatmeal that you mix up the night before you'd like to enjoy it and then let hang out in the fridge overnight. Poof! You have breakfast waiting for you in the morning! The resulting mixture is along the lines of an oatmeal shake, although you can adjust the amount of liquid in the recipe to achieve your desired consistency.

You don't have to use a peanut butter jar - any container (Tupperware, leftover Chinese takeout container, glass jar, etc.) would work fine. The jars are nice because 1) they use up that pesky little bit of PB (or cookie butter or Nutella...), 2) the airtight seal prevents the bananas from getting brown, and 3) it's easy to grab and go without worrying about spillage. I keep a spare glass jar around to use when I'm not making peanut butter-based oats for this reason.

It looks a little wonky now, but trust me, it's going to be awesome!

I love the addition of chia seeds (yes, like that chia) because it gives the oatmeal extra volume and keeps me full all morning long. When the chia seeds are exposed to moisture, they expand and have a tapioca-like consistency. Also, I cut my banana slices a little bit on the large side so that there are still banana chunks in the oatmeal in the morning. If you cut them smaller, you'll taste the banana, but you might not see the pieces. 


Getting cozy in the fridge, making friends with the lime juice and half & half.

Before I get in the shower, I take the oats out of the fridge and let them sit on the counter for 20 minutes or so to take out the chill. The result is still refreshing but not quite as frigid. It also gives the oatmeal some time to mellow and get ready for consumption.

 The finished product. Yum!

Overnight oats are great because they are so versatile. Don't like yogurt? Leave it out. Can't imagine oatmeal without brown sugar and raisins? Go for it! If you do a quick search on The Google, you will find myriad recipes and variations. I've made versions with peanut butter, assorted fruits, and even pumpkin. Feel free to experiment with all kinds of ingredients. You might find a new favorite breakfast!

Done! Now off to the recycle bin with you!

Peanut Butter Cup Overnight Oats

Makes one jar

almost empty peanut butter jar (or about 1 tbsp of peanut butter)
1/4 cup quick cooking or old fashioned oats (do not use steel cut oats - they won't get soft enough)
3/4 cup milk
2 tbsp Greek or regular yogurt (for extra protein and oomph!)
1/2 tbsp chia seeds
1/2 tbsp unsweetened cocoa powder
1/3 of a large banana, sliced
splash of vanilla extract
honey, sugar, or your favorite sweetener to taste
additional milk to achieve desired consistency (optional)

Add all ingredients to your jar of choice. Stir the mixture gently to make sure that everything is incorporated. Tightly close the jar and give it a hearty shake. Place jar in refrigerator overnight.

Before enjoying, let the jar sit on the counter for about 20 minutes to take the chill off. Open jar, give it a stir, and add additional milk as desired until the perfect consistency is achieved. Enjoy!