Monday, September 30, 2013

Pumpkin Season is Here!

The temperatures are a bit cooler, the days a bit shorter, and the trees a bit crunchier. That snap in the air can only mean one thing... 

Pumpkin. EVERYTHING.

I know some people out there are very anti-pumpkin and think the pumpkin-flavored trend is overrated and overdone.

Let me tell you up front that I am not one of those people.

This weekend, Andy and I headed to Trader Joe's for my annual pumpkin-flavored stock up. The results were epic.

For those of you keeping score at home, that is TWO jars of pumpkin butter and TWO containers of pumpkin yogurt. 

I purchased so much pumpkin-themed stuff in one swoop that even the guy at the register commented that I wasn't messing around with the pumpkin. I got the last can of chai, which I wasn't able to get at all last year, but I was merciful and left one jar of pumpkin butter on the shelf for some other like-minded individual. This stock up is on top of the things I've already amassed so far this season (pumpkin flax granola from Costco, Dunkin' Donuts pumpkin spiced coffee, etc.). I may have a slight addiction, but now, I am set for the rest of the year. 

I also learned that this is a thing and is conveniently located next to the pumpkin butter. Apple butter is another fall favorite of mine, and I'm excited to try this version.

Om nom nom.

In honor of the beginning of pumpkin spice season, I experimented with this twist on a traditional snickerdoodle, one of my favorite cookies of all time, which substitutes pumpkin pie spice for the mix of cinnamon and a hint of nutmeg that I use normally. I thought that the recipe as written was a little dry, so I added some more liquid to make the dough easier to handle and a bit more moist. They were a big hit at home and at a housewarming party that I attended this weekend. Happy fall!


Pumpkin Spiced Snickerdoodles

Adapted from Skinnytaste
Makes 24-30 cookies


1 cup whole wheat flour (I used white whole wheat, but either is fine)
3/4 cup all-purpose flour
1/2 tsp baking soda
1/2 tsp cream of tartar
1 cup sugar
1/4 cup butter, softened
1 tbsp honey
1 tsp vanilla extract
1 large egg
1/4 cup milk (or water)
3 tbsp sugar
1 tbsp pumpkin spice

Preheat oven to 375°F.  Line two baking sheets with parchment paper or spray generously with cooking spray.

Combine flour, baking soda, and cream of tartar in a medium bowl, stirring with a whisk.

In a large bowl, combine 1 cup of sugar and butter; beat with a mixer at medium speed until well blended. Add the honey, vanilla, egg, and milk; beat well.  Gradually add the flour mixture to the sugar mixture, beating until just combined.  Cover and chill for at least 10 minutes. (The chilling step is very important and will make your cookies and your life better, so don't skip it!)

The dough after chilling. 

In a medium bowl, combine 3 tbsp sugar with pumpkin pie spice, stirring with a whisk to combine. With moist hands (also very important!), shape dough into balls about 1 inch in size. Roll balls in sugar/pumpkin pie spice mixture until covered. You will probably have some of the sugar/pumpkin pie spice left over after this step. 


Place balls 2 inches apart onto baking sheets.


Slightly flatten each ball by pressing down gently with a fork.


Bake 375°F for 6-8 minutes (cookies will be slightly soft but the edges should have started to set).  Cool on baking sheets for 2 minutes.  Remove from pans to cool completely on wire racks.


Wednesday, September 18, 2013

Good for You Chocolate Lava Cake

I'll get right to it: chocolate lava cakes are awesome. However, they have never had the reputation of being good for you. Even if you make them at home, the average lava cake will have hundreds of calories for an itty bitty serving. What's a chocolate-loving girl to do about this conundrum?

After much searching of the internet, I found this recipe for a "Guilt Free Lava Cake for One," and unlike most "healthy" recipes you see around these days, I could make it with the ingredients I had on hand. Glorious!

I really don't like using the word "guilt" when it comes to food. I don't think we should ever feel guilty about eating. Our bodies need need food, after all. However, healthy isn't exactly the right word for this dish, either, because despite what the internet might tell you, desserts aren't exactly health food, even if they contain whole grains, coconut oil, powdered unicorn horn, or what have you.

I'm going to call this recipe "Good For You Chocolate Lava Cake" because it is nutritionally MUCH better for you than traditional lava cakes and let's be real - chocolate just makes you feel good inside.

The cake is lava!

I can't wait to try this recipe with flavored yogurt instead of plain yogurt. Raspberry? Coffee? Vanilla? The possibilities are endless. This recipe makes one cake, but it can easily be doubled, quadrupled, etc. to make as many cakes as you have ramekins.


Good For You Chocolate Lava Cake

Modified slightly from Girl Who Bakes

Yields one cake

1 tablespoon white whole wheat flour
1 1/2 tablespoon all-purpose flour
1 1/2 tablespoon granulated sugar
1 heaping tablespoon cocoa powder
1/8 teaspoon baking soda
pinch of salt
3 tablespoons non-fat milk
1 tablespoon non-fat Greek yogurt (or any non-fat yogurt)
1/4 teaspoon vanilla extract

Directions:

1. Preheat oven to 350 degrees F.

2. In a small bowl, whisk together flours, sugar, cocoa, baking soda, and salt.

3. In a separate bowl, mix milk, yogurt, and vanilla, making sure to get rid of any yogurt lumps.

4. Pour wet ingredients into bowl of dry ingredients, and stir until combined and smooth.

5. Generously spray an individual-sized ramekin with cooking spray. Pour batter into ramekin. Place on a cookie sheet, and bake for 12-16 minutes (I usually need about 14 minutes) or until edges and top of cake are set. The center will still be a little jiggly to the touch.

6. Let cake cool for 1 minute. Place a small plate on top of the ramekin. Invert the plate and gently lift off the ramekin.

7. If desired, garnish with berries, whipped cream, or ice cream. Enjoy!


Sunday, September 15, 2013

How to Make Filled Cupcakes

Since I've mentioned this technique a few times in my recipes, I thought that making an instructional page on how to make filled cupcakes might be useful, especially because it seems super intimidating if you've never done it before (spoiler alert: it's not that hard!). Just a little bit of extra work can take your cupcakes from awesome to over-the-top.

Materials:
  • A sharp knife (my preferred method) or cupcake corer (I use a small biscuit cutter for this purpose)
  • Your cupcake, cooled
  • Your filling, cooled


Procedure:

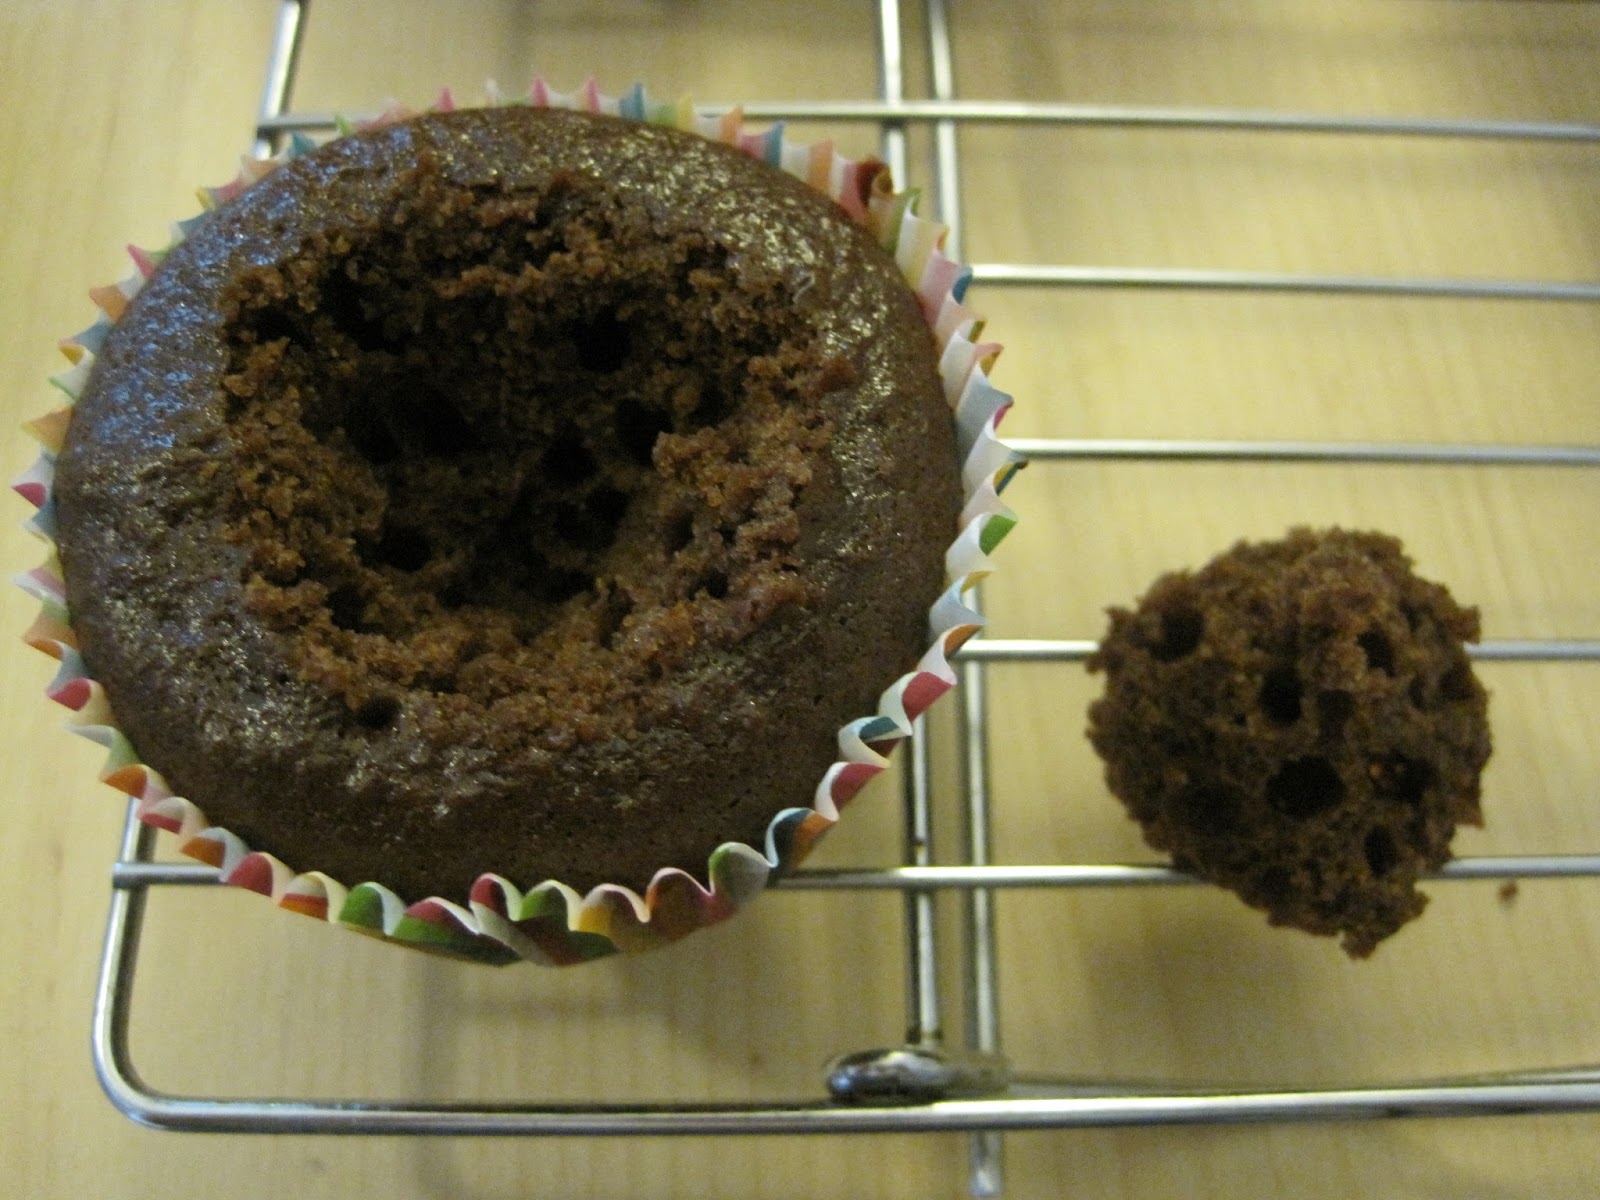
1. Remove the center of your cupcake.

If using a cupcake corer, gently twist the cutter into the top of the cupcake while applying gentle pressure, trying not to squash the cupcake in the process. To remove the cake, pull gently on the top of the corer, twisting a bit to separate the center of the cake from the rest of your cupcake.


If using a knife, place the knife at a 45 degree angle to the surface of your cupcake. Gently cut a circle out of the top of the cake, maintaining a 45 degree angle with your knife until you've cut all the way around to make a cut out in the shape of a cone. Gently lift out the cone.


This extra cake can either be eaten (RIGHT NOW), discarded (lame), repurposed (I've made cake balls out of the extra cake!), or used to cork your cupcake if you have a particularly tricky filling (like something with fruit that could look lumpy) or a liquidy frosting (like a glaze). More on this option in a second.


2. Fill your cupcake.

If you do not plan to replace the piece of cake that you removed in step one, fill your cupcake so that the filling is level with the top of the cake. You may even want to extend the filling over the edges a bit to make the surface flat. 


If you would like to put the cake center back on top of the filling, fill the cupcake about 3/4 full, leaving a bit of room for the displaced cake. Put the cake back in the center, gently pressing down to put it back into place. It will not be exactly level, but try to do the best that you can to get it securely in place.


3. Frost your cupcake.

Let the cupcake sit for 10 minutes or so to let your filling settle into its new surroundings. Your cake may absorb some filling, meaning you need to add a little bit more to get it to be level with the top. Also, if you have a liquidy filling, frosting the cakes immediately after filling may cause some of the filling to get carried along with the frosting, resulting in a swirl of your filling in your frosting.

After waiting a bit, frost the cupcake with your frosting of choice, making sure to cover any seams from the filling process. 


4. Bask in the praise of your cupcake audience. 

See that wasn't so bad, was it? I knew you could do it!